Friday, April 29, 2011

Bottom up!

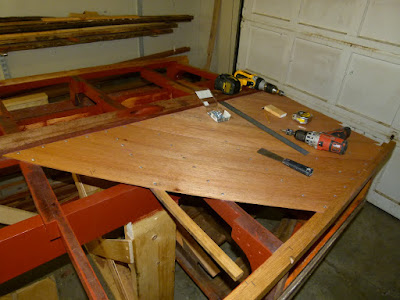
With the help from fellow woodyboaters, I now believe I have the right shade of red for my bilge. Time has finally come to start on the bottom. As mentioned before, I'll use use solid Philippine instead of plywood for my boat. The 3/16" x 6" is properly sealed with CPES, and I'm bedding them in 5200 to the frames and between the boards. I'm using #6 x 5/8" sheet metal screw to hold everything in place until the 5200 sets.


I have only done a few boards so far, but I'm happy with how it's going. Installing the intermittent battens is a breeze, since they are steam bent into shape. And no need to send someone into the hull holding while you screw from the outside. The boards go on at a 45 dgr. angle, so you simply mark you spacing, and screw the battens inn as you go. Cleaning up the 5200 is also easy, though not less messy, since you can reach in.

If you work by your self, I think I can recommend this approach over full 8' length of plywood. Though probably a little more time consuming.
Friday, April 15, 2011

Shades of Red.

This issue is driving me crazy! I have samples of 3 different "know" Chris Craft bilge paints, and the one I think is the best match, No. 3, is considered the correct for postwar Chris Crafts. And No. 2 is commonly known as the match for prewar boats (#2301 Farmhouse by Sherwin Williams). Yeah, I know, the paint on my old hull is 70 years old and probably faded as such, but still...
No. 2 seems to be too orange.


Help... Anyone?

Thursday, April 14, 2011

Going diagonal.

As mentioned earlier, I'm going to use 3/16" thick mahogany in stead of plywood for my inner bottom. Other restorers, both pros and amateurs alike, have said to me in a friendly way that's too much work, you will regret not using plywood. On the other hand, the purists have given me high fives and bear hugs when I mentioned traditional planking.

I've put a lot of thought into both options. Though more work, I believe properly sealed and properly bedded with 5200, the traditional diagonal bottom is just as good as plywood. And it's going to look a hole lot better. You can "score" diagonal lines in the plywood as much as you want, but you will still see the grain going the length of the boat under the paint.

The Woodery in Lunenburg MA, re-saw and planed some 1" x 6" Philippine down to 3/16" for me. It is now sealed with CPES and drying in the early spring sun.


It's somewhat a shame that it's going to be painted sort of "barn house red" bilge color.

Wednesday, April 13, 2011

Steaming again.

Between the frames there are 20 pcs. 9/16 x 7/8" battens on each side on the boat. Cut these out of White Oak and getting the seam generator and steam box ready.


After the Oak has been "cooking" for 30 minutes, I used the boat as a jig to achieve the correct curve on the battens.


With the inevitable spring back when steam bending wood, the battens will have the correct shape of the bottom after drying. I'm marking the correct length before removing the clamps. Once dried, I'll seal them with CPES.


Monday, April 11, 2011

Back at it!

With the warmer temperatures, I'm back at it. Took the chines off after drying over the winter and sealed them with CPES, and permanently re-assembled them with 3M5200.

Time has come to address the shaft hole though the keel. Got the old strut wire brushed, and ordered a new cutless bearing and strut bolts from Classic Boat Connection. With a Google search I learned that the easiest way to remove the old bearing is to carefully use a hacksaw to cut down the length of the bearing. Then it's easy to use a screwdriver to "peal" it out.


Taking measurements from the old keel for correct placement of the rudder and strut.


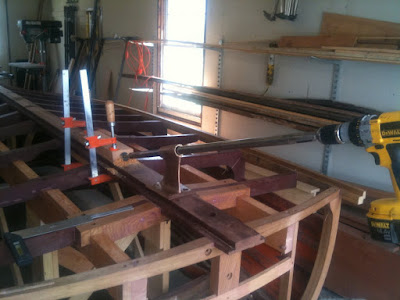
With the help from a 80 year old machinist in the neighborhood, he modified my old shaft onto a extended Forstner bit. The shaft is ready for replacement regardless, and this way I can drill the 1 3/8" diameter hole through the keel accurately with the strut as the guide.


Next thing to-do, making and steam bending the 9/16" x 7/8" bottom battens.