Thursday, August 30, 2012

Like a new engine.

My model K engine is back from rebuild, and it looks really good.

Before, a rusted out and seized engine.


As good it looks on the outside, more important is the inside. All the components like, generator, fuel pump, oil/water pump, carburetor and starter has been completely dissasembeled and rebuild. New valves and seat, new pistons, rings and bearings. Bad cylinders has been sleeved and correct vintage wiring.

Like a new engine


Pre-war CC engines have a deeper blue than post-war.

Wiring with thumbscrews.


Closeup of the carburetor and fuel pump.


Wednesday, July 4, 2012

Initial fairing

The last topside planks are installed and screw holes are bunged, and its time for initial fairing of the hull sides. Used a DeWalt right angle sander with a 8" softpad for a quick rough sanding of the bungs and plank joints. The renaming sanding will be done by hand with longboards.

Moved the hull outside since it generate a lot of dust. Jacked it up into manageable work height.


Next up is new covering boards, deck framing and planks. However, due to extensive travel the next year, the boat will get another hiatus as I will spend much of my time in Europe.  Who was counting time anyway....... The work will continue in August 2013. Check in for updates then.

Sunday, June 17, 2012

Last topside plank


The last topside plank is fitted, ready for final installation. It has been a tough job getting the seems nice and tight, and getting the planks to conform to the hull without cracking. 


I have used the well described router method by Dannenberg. The backside of the plank is "glued" to the battens and frames with 3M5200 and I have used West epoxy in seam between the planks. The 5200 will not sand flat, so if you don't get the seams completely tight, you can feel the seam after sanding. Epoxy dries hard, and you can sand it flat. Mixing it with a thickening agent with a hardwood color.


I thought I had a lot of clamps, but just about every single one was used when dry-fitting both top planks.


Dannenberg state in his book that he uses 65 hours to rough cut, rout, fit and final assembly of the topsides of a small runabout. Experience must make it easier and quicker, or maybe a helper or two, because I used more than twice that time.

Friday, May 11, 2012

Topsides.

It's time for the topsides, and I've been nervously looking forward to this. I knew this would be difficult, getting nice, even and tight plank seams. First thing to do is to modifying the laminate trim router according to the well described router method by Danenberg.


I used the old planks as a rough template to size the new wood. However, the old plank was very much out of shape, and I had to rough fair the new plank on the boat. 


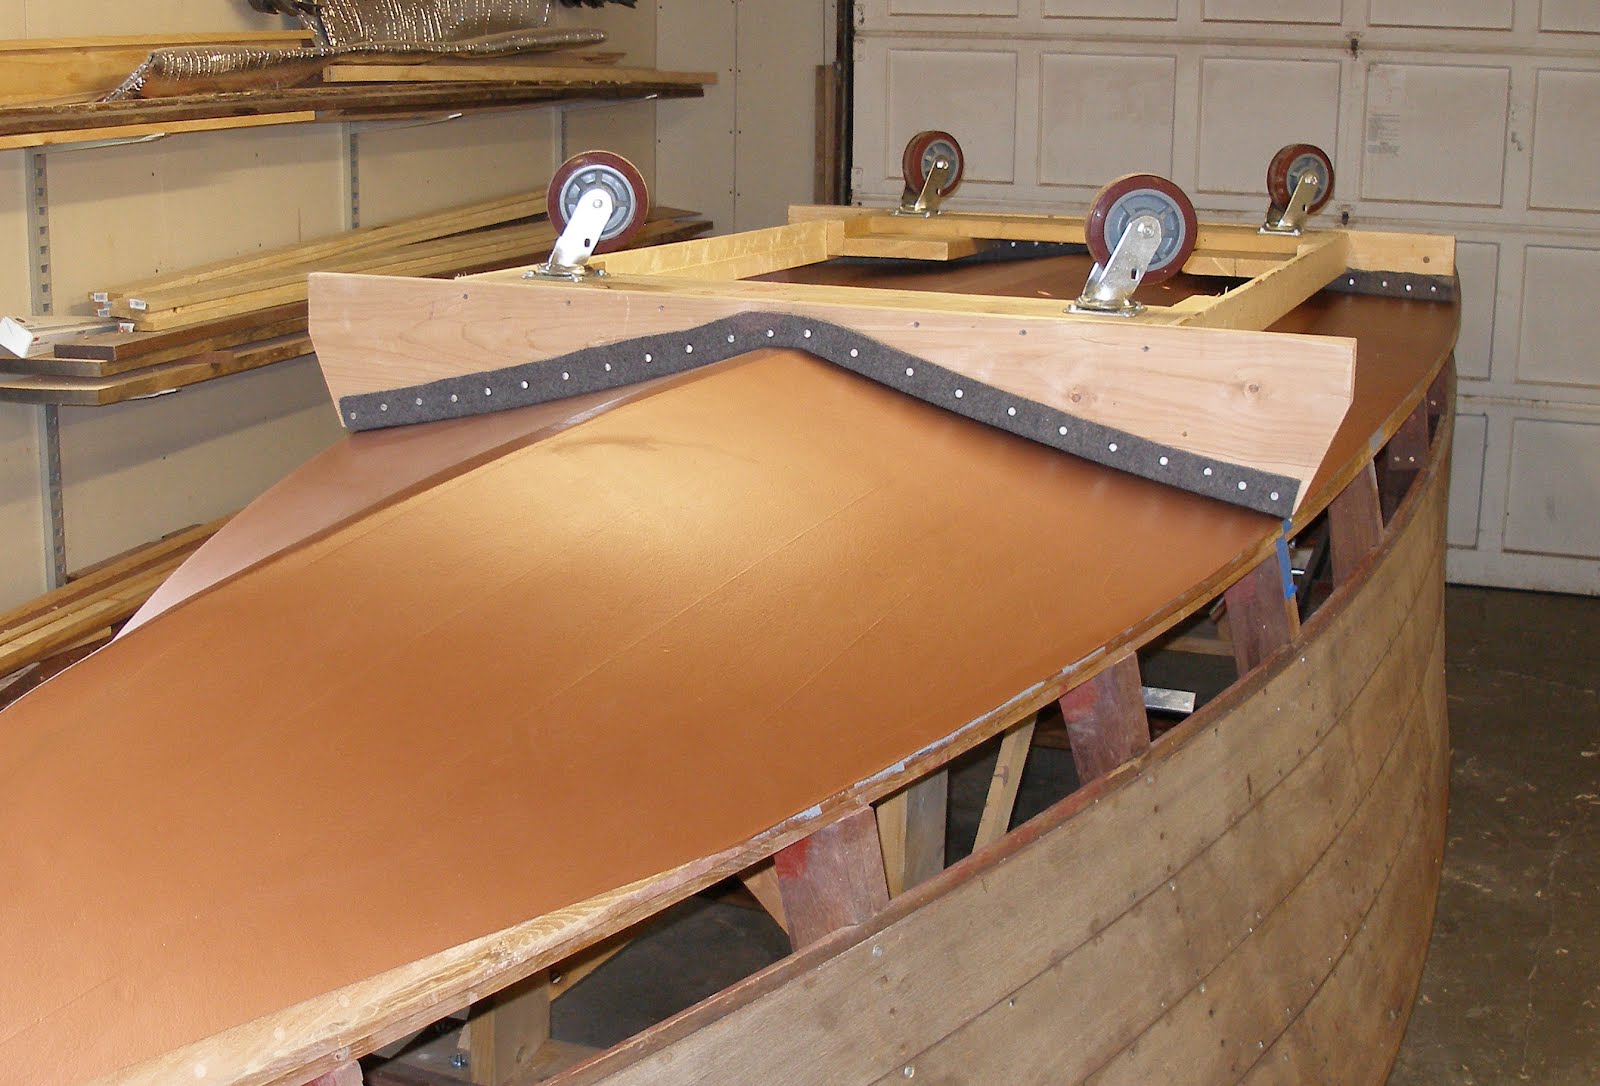
Using the chine rabbet and the router setup, the joint between the 1st. plank and the chine is perfect. It took a few tries to get it right though. Holding the router steady against the chine is not easy. Up front it's only 5/8" wide "flat".


There it is, 1st. plank down, nine to go! It's glued and screwed in place with 3M5200. Also used 5200 in the seam between the plank and the chine. Between the plank to plank seam I will use West epoxy with a filler. If there is a little gap between the planks, you will not be able to sand the 5200 flat. I will still use 5200 between the batten and plank. Thanks for the tip Mike!


Now, on to the next ones!

Sunday, April 8, 2012

Batten up!

The topside battens are fitted and installed with 3M5200. I had them soak for several days so they would conform to the hull shape. The top batten (called shear stake?) soaked for 6 full days, and I still needed to use clamps as weights to make the necessary twist.


Screwed and "glued" in, showing the barrel stern.


I'll let the 5200 cure for a full 7 days. 3M5200 cures with the humidity, and it has been very dry for several weeks. The on to topside planking and routing. But first, selecting the right wood to use, with regards to grain, color and pattern.

Friday, March 30, 2012

"Just because they where there..."

My wife asked me yesterday "why are you putting in all those small screws"? Well, they have no purpose now really, with a "5200 bottom". The 3M5200 adhesive is now holding the inner and outer bottom together. I guess the 1/2" button head screws was put in originally to hold the bottom "sandwich" together, and to add strength to the bottom between the battens and frames.

And since they where there originally, I just had to put them back in....


Straightening up.

With all the topside battens and deck framing off, it's time to straighten the frames before the new battens and new sides are installed. Most of the starboard frames needs to come out anywhere from 1/4" to a full 5/8". Temporary blocking is screwed in to hold the right shape until planking is complete.


The stem had to come over about 3/8" as well to be plum.


New mahogany battens are next, and I am soaking them for a few days. Kill dried wood (no it's not a typo) is to dry and stiff to easily conform to the the stern shape, especially the top three (3) battens.


Tuesday, March 20, 2012

Bare bones, again.

With the boat upright, time has come to the topside and deck. It took about a full day to remove all the screws to take the side and deck planking off. And there's a lot of rotten wood.....


A view of the new bottom. Like original except with the use of 3M5200 and CPES. Diagonal 3/16" x 6 Mahogany inner layer, White Oak intermitten battens.


Time and moisture have done it's work here.


Next to do is remove all the deck beams and framing. These hang from the outer 16/4 (4" thick) Mahogany covering boards. So the topsides and new covering boards are next.

Sunday, March 18, 2012

On even keel.

After 2 1/2 year on her back, she's finally on even keel. Bottom, frames, keel and chines all new. 100's of hours, stopped counting long time ago. With a good setup with A-frames, 4" straps and chain-falls, the flip is an easy 2 man job.


Now we can see the beautiful lines of the Barrelback, which it's called. Can't wait to get started on the deck and topsides.


Friday, March 16, 2012

Sping time, move ahead.

Back in business after the winter hiatus. The bottom was painted with to layers of copper bronze in December and have had a few months to harden. The copper bronze has like 30% of copper in it and is a strange paint to put on. Got several tips on have to lay it, thanks to all. I ended up warming up the shop to about 75ºF for several days, and also made sure the paint was at that temperature. Use a 6" high end foam roller and was able to get a good even coats. Maybe not as shiny as I wanted, but even and without lines. I will brush it on up the sides to the waterline when times come.


I'm also getting ready for flipping the boat right side up. It's been 4 years since I turned it over to start on the bottom and frames. Darn it, time just fly... It only prove my time + cost formula, estimate x Pi.

Finished up a crate based on the spacing from the original Chris Craft line drawing of the boat. 6'-7 1/2" center-center.