Sunday, December 19, 2010

Year end....

Well, it's mid December and winter is here. It'll have to wait until spring for boat work again. A trip to the Sunnyland boat show in Tavares, FL is planned for the end of March. Lots of nice boats = kick in the rear to get started again on my own again.

Happy New Year!

Monday, December 6, 2010

Got wood.

Spent the morning at ML Condon Lumber in Stormville NY picking out wood for the bottom, sides and deck. 430 board feet of 6/4" Philippine mahogany that they will re-saw and plane down to 1/2" for me. Not a cheap service, but will save me a ton of time on my light industrial band saw and planer. Doing this my self will simply take forever and they will deliver to my door.


Fairly happy with the quality, there is alway that uncertainty on what to get once it's planed. Secured very nice ribbon grain wood for the transom, ceiling boards and possibly enough for the inner covering boards.

Friday, December 3, 2010

LOOK.... no clamps!

It's getting cold in the garage, and I reached my goal for the "fall work session". Forefoot/stem/keel is permanently assembled. New engine stringers are screwed and assembled with 3M5200 to the frames and the topside frames are done. The transom frame is re-made, assembled and mounted to the stringers. Chines are steam bent, shaped and the rabbets are routed. The frames are faired in and the boat is straight and true.


The only thing not permanently bolted in are the chines. They need to dry over the winter since I used "green wood" for them. I'll seal with CPES and assemble in the spring.


All ready for the new bottom planking next spring. I will go with diagonal 3/16" mahogany inner planking instead of plywood. This may be more work but it was the original way and will be just as good if you butt the planks with 3M5200, and seal the wood with CPES.


Off to buy mahogany planking.....

Thursday, November 18, 2010

Fitting the engine stringers.

The engine stringers are now notched out, pre-drilled and fitted to the frames. Sealed with CPES and drying in the fall sun. Permanent installation with 5200 and final installation of the transom frame next week, and I'm about done before the winter arrives.


Tuesday, November 16, 2010

New stringers

Have the new engine stringers traced from one of the old ones. Used a jigsaw to cut one, hand plane and shape into the finished shape, and then using a copy router bit with a 2" cutting length to cut out the second one. This assure that you will get two identical pieces, since it's hard to get a get a perfect 90 dgr. cut, even from the best jigsaws.


Got some very nice Douglas Fir for the new stringers through The Woodery in Lunenburg MA. Not easy or cheap to find knot free, tight grained CVG Douglas Fir here in the Northeast, but that's what it calls for.

Monday, November 15, 2010

"With no string(er)s attached"

With the keel, stem/forefoot and chines bolted inn and the final fairing of the frames done, time has come to the engine stringers. Or keelsons as it's called in the old Chris Craft literature and drawings. The starboard side is rotted on the top, and the port is split the entire length.

Lifted the hull up 6" and it's now held up by 4 pcs. 2" x 4" clamped and screwed to the frames.


With the transom frame out, it's easy to just pull the stringers out the stern.

Tuesday, November 9, 2010

More routing.

Done routing the rabbet in both sides of the keel. Coming along quite well.

Just the two topside 1/2" deep chine rabbets left, then onto replacing the engine stringers.


Saturday, November 6, 2010

Rout baby, rout.....

OK, that was a bad line, but the best title I could think of......

The frames are all faired inn, and the jig is screwed onto the bottom frames for routing the bottom rabbet on the Starboard chine. Again, just like a picture from Dannenberg's book.


I did the 3/4" rabbet in several passes, no more than 3/16' deep. I opted to use my little 2 HP router VS. the larger 3 1/2 HP. Less weight and size, and easier to control up against the stem.


One down, five to go....

Wednesday, November 3, 2010

Holding her own shape.

The keel is now bolted in and permanently assembled with 5200 and the chines are screwed and bolted to the frames as well. It's been many years since this boat was this straight and true.

Now just a final fairing of the frames before routing the rabbets in the chines and keel.


Just like a picture from Dannenberg's book. I'm cutting a 3/4" deep rabbet, 7/16" for the planking, 3/16" for the diagonal mahogany inner bottom, and an extra 1/8" for 5200.

Transom frame Ver. 2.0

New transom cheeks are laminated with 3M5200 and cut out on the band saw. Since much of the work with the first pair was to trace accurate templates from the original, that task with the replacements was not bad. Just to make sure you get the continuous changing outside angle correct.


The new laminated pair. It will be very hard to notice the "glue" line when painted.


The finished transom frame, sealed with CPES and assembled with 3M5200.

Tuesday, October 19, 2010

(Butt?)-Cracks on cheeks.

I promised that I would would write about the downturns during this project too, and here is the biggest disappointment so far.

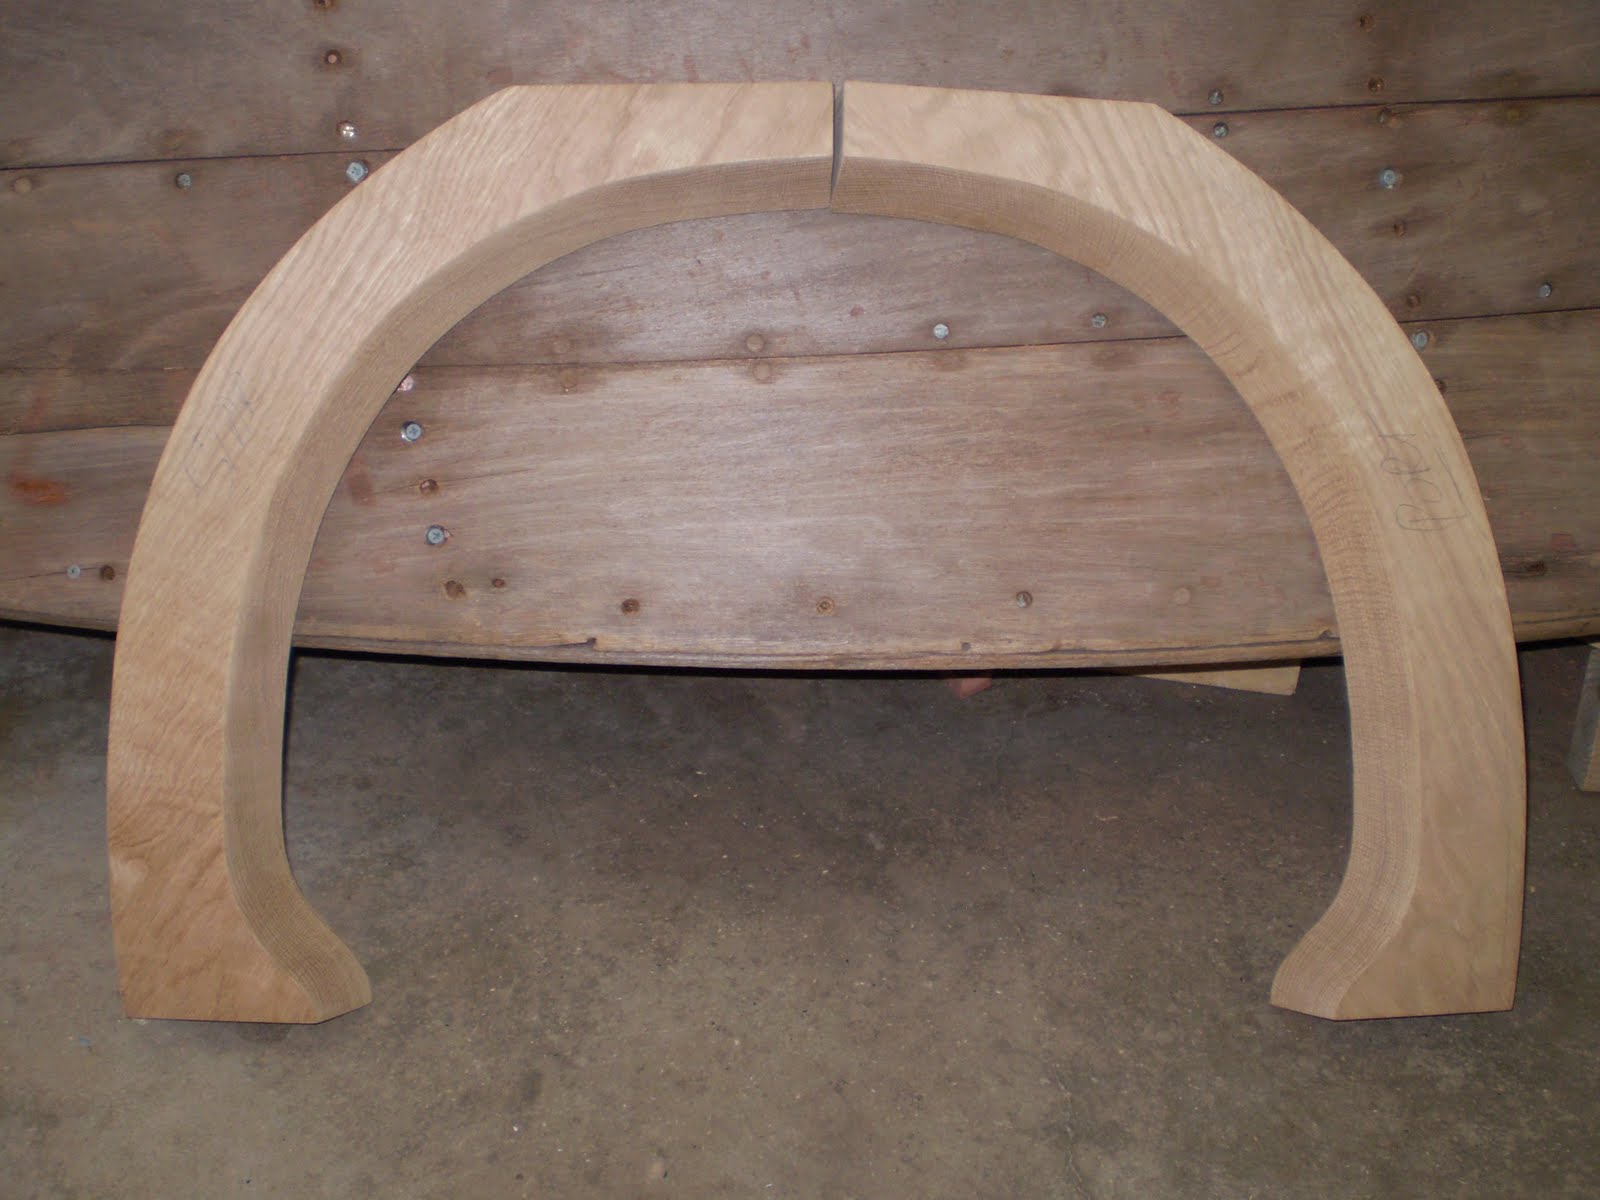
With 20 hrs. of work it took to make the two transom cheeks, cracks have appeared on both of them. Can't believe it.... I made them almost a year ago with good, flat sawn White Oak. And no sign of checking during this time. As soon as I assembled the transom frame, the checking started. And the cracks are almost 1/3 of the thickness.
My guess is that the tension from being mounted in the the frame made them fail now.


Now, let's talk about the poor design for a moment. This was bound to happen. The barrelbacks cheeks are quarter-round, and made out of one piece of wood. Originally they used Mahogany in this boat, but chose to use White Oak as described in Dannenberg's book. Still, there is no strength in this single piece of wood, shaped like this, regardless on species.
And as Danneberg write in his book, the cheeks are almost always broken on every boat his been working on.


Now, what is the solution? Anything other than original will upset the purists, which all boat show judges are. I'm also committed to stay true to the original design. But then again, this design is wrong, and I feel that the original designed cheeks will brake sooner than later regardless.

Lamination? I've been struggling with finding the right answer. Laminate two pieces together? Three, with the center piece being two pieces jointed together at a 30-40 dgr. angle to get more straight grain holding power?

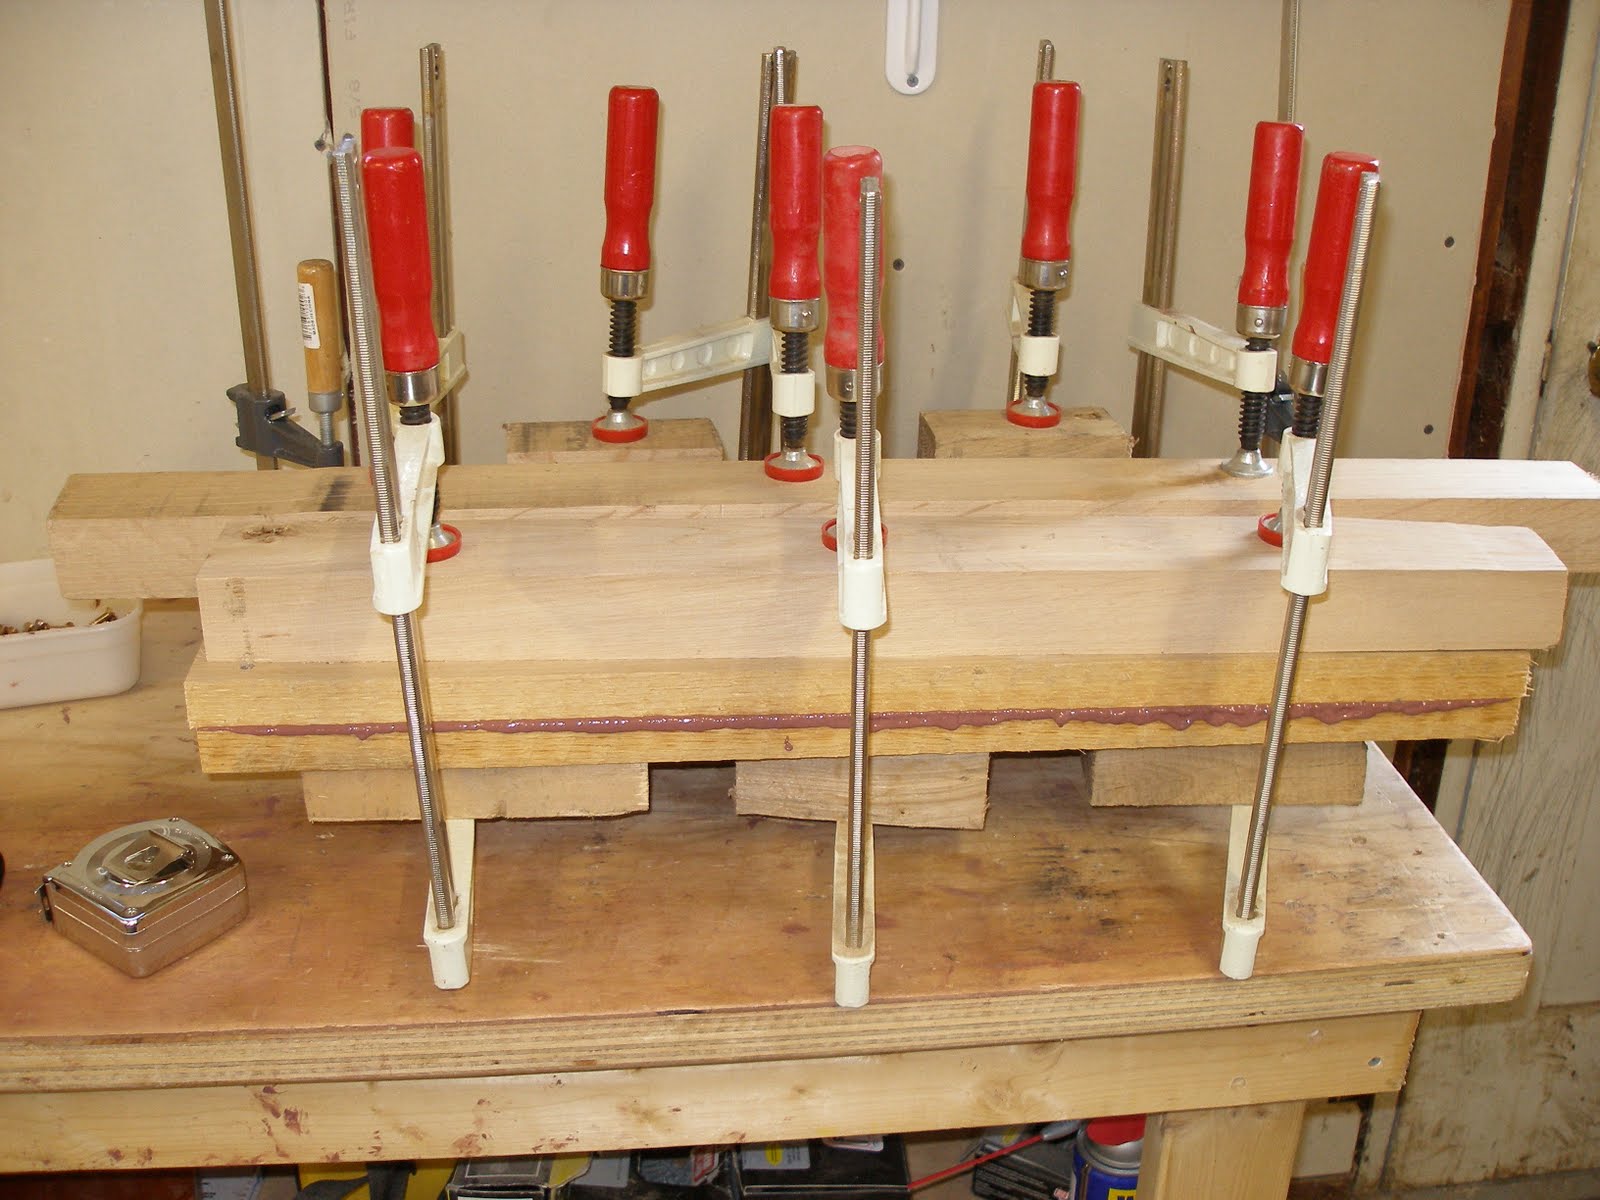
Well, after discussing with several "Woodies", I've decided to laminate two pieces together. This will increase the strength and checking resistance VS. a single piece of wood and still remain very close to the original design. The glue line will be close to invisible after painting.

From what I have read and know about wood movement, epoxy lamination is out of the questions with solid wood. So I'm choosing to laminate with 3M5200. From the information I gather from professional restorers, 3M5200 will not de-laminate and is of course THE recommended adhesive for wooden boat work.


Am I right, am I wrong? Please comment!

Monday, October 11, 2010

Back to bare-bones

The new keel is fitted and the chines are steam bent to the correct shape. It's time to take it all apart again for CPES sealing of all the frame parts, and permanent assembly with 3M5200 and new silicon bronze screws (slotted of course).


New and old keel, side by side:

Tuesday, October 5, 2010

Transom frame

That was a lot of work! From cutting out the transom cheeks with the ever changing angles, to the learning curve of getting the steam bending right. I am very happy with the result though. The entire frame made in White Oak, the top and bottom bow steam bent, when assembled with 3M5200 this will be much stronger than original.


Before picture:

Chine.. (on you crazy diamond)..

Moving along to the chines. Cutting the angles fit with the stem, dry fitting and steam bending.


Thursday, September 30, 2010

Transom and keel work.

Chipping along and getting work done. After a week of trial and error, I'm finally satisfied with the upper and lower transom bows. The curve is correct and no checking or cracks.

Starting the fitting and assembly of the new transom.


The new Mahogany keel is fitted to the bottom frames and to the forefoot/stem assembly.


Things are coming together!

Thursday, September 23, 2010

Now we're cooking!

After burning out three heater elements in a day, I got the bugs out of my steam generator. I raised the water level to 2/3 of the riser pipe, and no problem. Also tried to steam my lower transom bow in a uninsulated plastic pipe, without much luck.

Got some 1 1/2" aluminum sided "Styrofoam" to build a proper box and getting 211-212 Fahrenheit (99-100 dgr. C) in the box. With blocks screwed to the workbench, I have no problem getting the right curve. Though I had to cook the piece 3 times, with overnight soaking in between, to get it the way I wanted. You live and learn......


The upper transom bow cooling off:

Friday, September 17, 2010

Mark Clawson Magic.

Two years ago when I started asking questions on where to send my instruments for restoration, Mark Clawson was highly recommended for pre-war gauges. People also said; "It will take some time though", and they were right on that point. Yesterday I receieved back my blue-faced gauges 1 1/2 year after I sent them out. And they are awesome! His workmanship is exeptional good, we are fortunate that there are craftsmen like him left.

Before:


After:

I also want to mention Dale Kocian for gauge work. He also have a great reputation among woody boaters and is a great guy. He is also about 30% less in price than Mark. I just sent him 3 Chris Craft gauges for a 1958 Riva Florida for a friend in Norway, that had a 5 day stint under water last summer.

Friday, July 2, 2010

General fire extinguisher

The correct brass fire extinguisher is needed for a boat restoration. Dan Sakas in California (www.vintagefe.com) has done all the research on the type of fire extinguisher used in Chris Craft's from the late 20' to the 60's.

Post-war extinguishers are fairly available on eBay. But a complete show quality pre-war with the correct bracket is rare at best. Dan has collected them for years, and had the one I needed for my project. It's not cheap, but well documented and great work on the restoration.


Very good looking with the blue and the black imprint.


Sunday, April 18, 2010

Not much, but a little woodworking.

Not much time for boat work. Kids, house renovations and "pays-the-bills-work" have me plenty busy this spring, And will keep me busy for the 1. half of the summer too. But today, I just had to go out in the shop to cut some wood. Not much, but at least I have the feeling that I'm actually working on this thing.

Last fall, I took the liberty to round the cross member for the 1. frames. In all logic, this looks more correct and craftsman's like. But, its been haunting me, will the judges see it? Well, now it's done, back to the original, even though it don't look right.

My "improved look":


Original design:

Monday, April 12, 2010

Shiny but broken

Well, this is what you get working with 70 + year old sh*t (I mean things, of course). The prop is nicely polished up, but I found a thin crack 3/4 through the hub.

I'm trying to find someone that could repair it, since it is the original 1058 Chris Craft prop. But no luck so far. Anyone with a good contact, please speak up. My guess is that I'll need to get a new one.

Sunday, March 14, 2010

Spit-shine.

More work on the hardware. All the brass hardware is black and pitted after 70 years. So I bought a buffer from Grizzly to work on it this winter. First I bought a $80 "heavy-duty" 8" version from them, and as I should know by now, cheap stuff don't work. After 20 minutes it sounded like cold starting a 80's Mercedes Diesel engine.

Hats off for Grizzly, they took if back under warranty, and even refunded the return shipping. I could even upgrade to the $275 version. It has a 1 1/2 hp engine, long extended shafts and work like a dream. But, this is dirty work though.

Here's before and after pictures:


Monday, March 8, 2010

Mahogany story

After waiting 9 weeks, I got a reply back from the USDA Forrest Service on the type of mahogany I looked at in my mechanic's shed this winter. It is of the Swietenia family, a genuine Mahogany, like Honduras Mahogany. It does not come like a big surprise, as the grain pattern and color was much darker than Philippine Mahogany.

However, ML Condon Lumber in Stormville got in 4 bundles of 16/4 Philippine last weeks. As far as I know, this is the first time this has been available in the last 10+ years. So, I was there today to pick out my 16" wide by 15' long piece for my coverings boards.

It feels good to get the correct wood specie used original, though, I think the wood had a much deeper red color 70+ years ago. I guess it won't matter that much since it will be stained with a Walnut color.


Friday, February 12, 2010

Soreng switches

Winter, and too cold to work outside in the garage on the boat hull. Spending free time scouting eBay for much needed parts. Was able to buy some rare original Soreng switches needed for a correct restoration. These have small knobs, knurled nut and a round body. California Classics offer a reproduction version, but with the later square switch body, and at $66 each.

Some cleaning and re-chroming the knobs, these will look new.